

Willamette Valley, Oregon Zone 8b
“Too old to plant trees for my own gratification, I shall do it for my posterity.”
—Thomas Jefferson
To plant a tree is to believe in the future. It is a wonderful thing to watch a sapling grow and produce ever greater returns of fruit, wildlife habitat, or perhaps shade for a lawn chair. Trees only know how to give. All we need to do is to get them in the ground and let them do their thing. However in our zeal to get them off to a good start, we tend to make one or more of these Seven Common Mistakes Planting Trees.
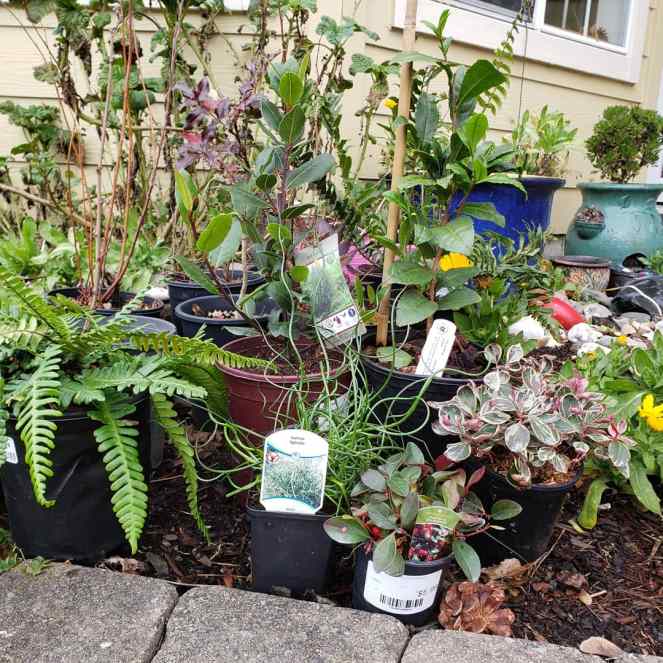
This guide is for many other perennials too. Shrubs, ferns, flowers, cane fruits, even ground covers all benefit from the right start in life.
Checklist for Choosing a Tree
- Ensure that it will thrive in your USDA growing zone.
- Ensure that your tree will get the sun exposure required.
- Choose a pest and disease resistant variety. This OSU Extension Publication has excellent charts.
- Check what soil pH it prefers. Our native trees (in general) do well in our native acidic soil. Fruit trees generally prefer more neutral soil. Soil pH takes time to modify (a month or more) so take a test and begin to amend before you bring your tree home. If you already have your tree, go ahead and plant it then top dress with lime to raise the pH or ammonium sulfate to lower pH, according to the directions and soil test results. Retest every month or two until you achieve the desired pH range. How to test your soil.
When to Plant
Dormant season (November-February) is ideal because it will have access to adequate water, and time to put down roots before spring puts on demands for growth. However, I’ve planted trees and shrubs with success in every month of the year. If you plant during the growing season, pick off any flowers, or fruits, prune it back (except for conifers), and do not allow it to become drought stressed for the first year.
Bare Root Prep
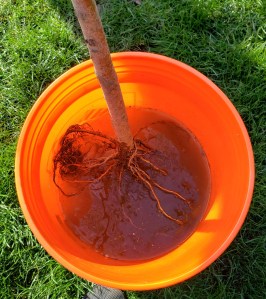
This is my favorite way to receive a new tree because I don’t have to deal with removing potting soil and tangled roots. If your tree arrives with a bare root, it is beneficial to soak the roots in a bucket of water to hydrate the tree before planting. Soak for 2-12 hours before planting. I like to soak at night before bed and plant in the morning. Keep the root crown above water.
Nursery Pot Prep
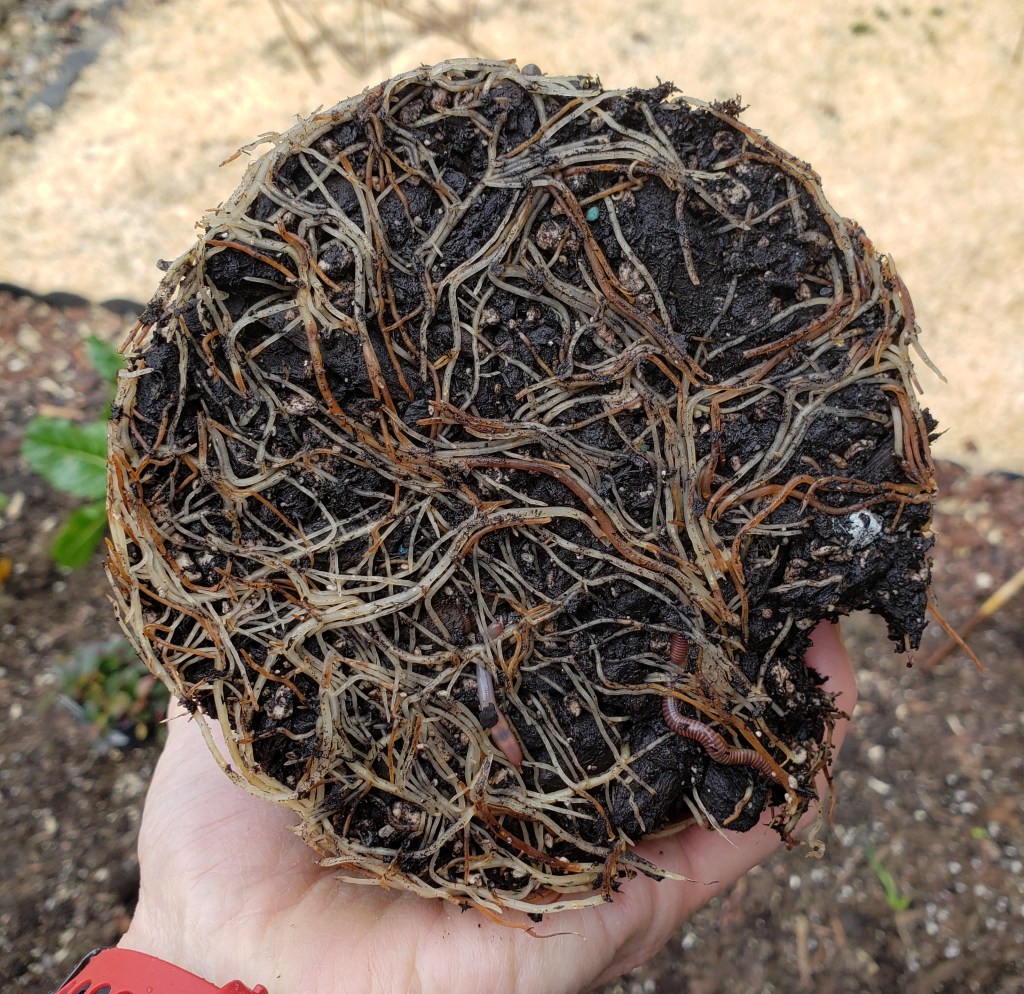
Remove the tree from the pot and wash away all planting medium. I use a hose on shower mode, or soak for a few hours bucket of water. The water should reach just below the soil line. Then spread (untangle) the roots so they radiate away from the trunk. I sometimes used a hand cultivator to comb the roots out. Prune any that are determined to circle or are shooting upwards, etc, with clean and sharp, bypass shears. Circling roots will eventually girdle the trunk and strangle the tree. Also prune off any exceptionally long roots that might make it difficult to plant without circling back in.

Planting

- Hole depth: Keep the hole shallow, only digging as deep as the roots need. Usually about one to two feet deep. Keep the root flare at, or just above, ground level.
- Hole width: twice as wide as the roots. This loosens the soil for the roots to penetrate as it works to get established. (Trim and extra long roots.)
- Stab the edges of the hole with a digging fork.
- Build a little mound in the bottom of the hole to spread the roots and support the crown as you refill the hole.
- Do not amend the hole with any organic matter like compost, manure, ect. Only use your native soil. Organic matter eventually rots away and your tree will sink into a pit. Also, if the soil is homogeneous with the surrounding soil, water will move naturally. Save the compost or potting soil for top dressing after planting.
- Plant high-and-tight. Some sources recommend planting at the same depth as marked on the trunk, but this can be deceiving because some nurseries heel-in their trees in loose mulch leaving a wet mark high on the trunk. Keep the shoulders of the root flare at, or above, the ground to allow for gas exchange. If it is planted too deep, the bark around the trunk can rot, the tree won’t breathe well, and it will likely become sickly.
- Back-fill with the native soil and lightly press to remove any large air pockets.
- For fruit trees, check the pH of your soil and top dress with lime to bring it up to 6 – 7.5 pH range. Do not add lime when planting native trees. Our native species prefer our naturally acidic soil (about 5.5 in the Willamette Valley, OR).
- Water in to settle the soil and roots.
That’s it for getting it in the ground. But you’re not done yet.
Grass is a nutrient and water sponge and should be removed at least to the drip line of your tree at maturity. For my dwarf fruit trees, I went 10 feet in diameter. I would have liked to have gone out to 15 feet but I had to settle for 10 feet due to space limitations.
Then you can choose to plant a fruit tree guild or add wood mulch.
Important! Keep the cardboard, compost, leaves, and wood mulch from contacting the trunk to avoid trunk rot and pest damage.
Both methods use the same first steps:


No trunk contact. 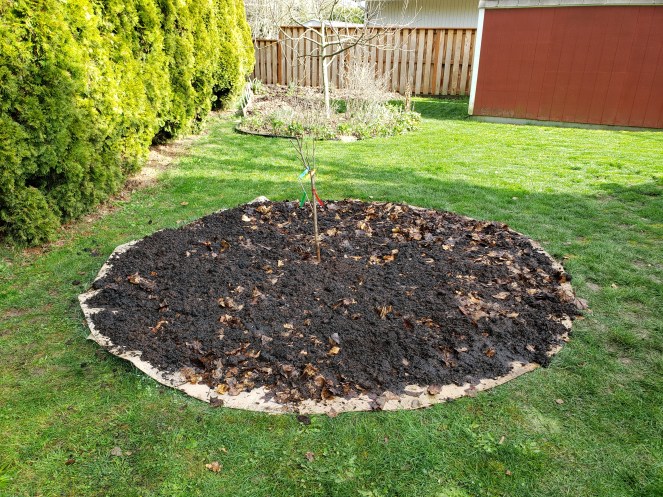
I have heavy clay, so I will employ worms and microbes to improve the soil as they incorporate the sheet mulch, leaves, and organic matter into the soil for me. Thanks for your service soil fauna! 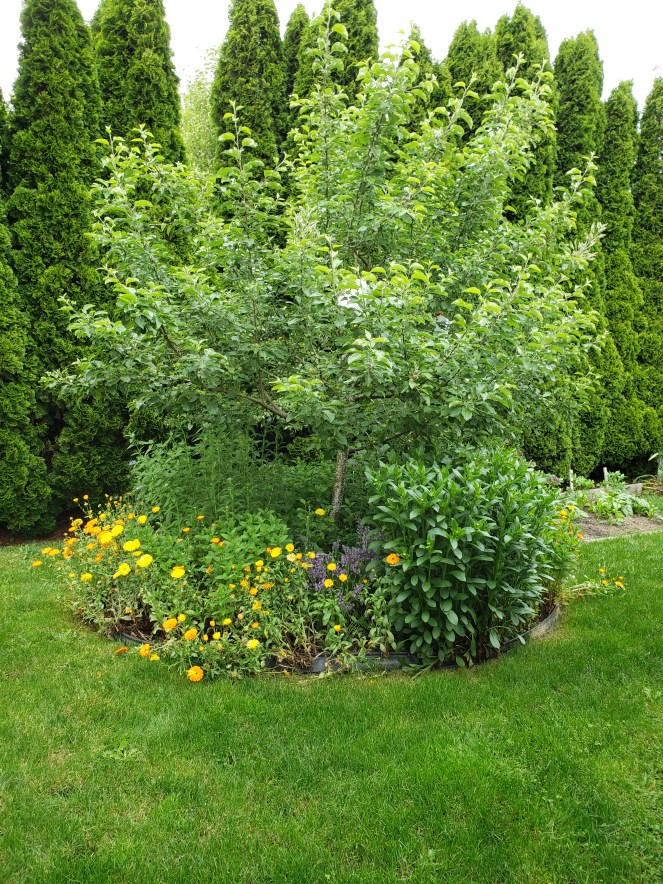
Mature apple tree guild.
- Paint a circle on the ground: Tie a string to the trunk of the tree and measure out the radius of dripline at maturity. (I used five feet, but would have liked to go 7 ½.) Then I tied on my spray chalk can and sprayed a 10’ circle around the tree.
- Sheet Mulch: Next, sheet mulch the area with several layers of cardboard.
- Lay cardboard, with overlapping edges. You need at least one layer, but two is better.
- Stab holes in the cardboard, to allow gas exchange and worm movement.
- Wet cardboard thoroughly. I leave my cardboard out in the rain prior to laying it out as sheet mulch. It is easier to work with when it is soft.
Fruit Tree Guild
- Once the cardboard is down, perforated, and wet, add a thick layer of fall leaves and a few inches of compost. Then leave this to rot down until spring. (Nothing should be touching the trunk of the tree.)
- In spring, plant in a guild of flowers and herbs that provide a secondary harvest, support the tree by fixing nitrogen, provide beneficial insect habitat and forage, or pest repellent properties. Good choices are comfrey, nasturtium, calendula, sweet alyssum, catnip, oregano, chives, yarrow, verbena, crimson clover, marigold, and whatever else you find useful and beautiful. Avoid any heavy feeders.
- To retain moisture during the summer, feel free to mulch with straw, compost, leaves, leaf mold, or wood chips.
My guilds have worked beautifully. They are a cornucopia of buzzing and hunting insects and spiders. The birds also enjoy the buffet of bugs and seeds. Although, I still suffer codling moth damage because they attack the crown of the tree and are mostly unaffected by under-plantings. Although, when I see a spider web around an apple I know they are safe. High-five to spiders. Or should I say eight? But really, the bugs are everywhere–when I work on the tree during the growing season, I’m picking bugs out of my hair, they are crawling on my arms, I even had a ladybug larvae down the back of my shirt. Seems gross, but in the light of worldwide insect population crashes (Nat Geo article, BBC article) I can’t help but be happy about it. My tree is happy about it too, and puts out a bumper crop of apples each year.
Not ready for that yet? That’s OK. A tree is still a source of life, even without a guild.
Mulching
3. Haul in wood chips and add several inches on top of the cardboard sheet mulch to keep the grass away and hold moisture. Wood chips are beneficial in transitioning your soil from bacterial dominated to fungal dominated. Mulch holds moisture and improves the soil as it slowly breaks down. More about mulches.
Planting Shrubs
Follow the above procedure for planting perennial shrubs. Modify any guild plantings so as to not compete with your shrub for light. Also be sure to verify the pH your shrub prefers and adjust the soil accordingly.
Water
Water consistently through the dry season July – September to help your tree or shrub become established.
Resources
- OSU Extension: Growing Tree Fruits and Nuts in the Home Orchard (.pdf)
- OSU Extension: Native Plant Gardening
- If you are interested in Oregon native plants, check out our Backyard Habitat Program
- Metro: Native Plants for Willamette Valley Yards booklet. (.pdf)
