
Willamette Valley, Oregon, Zone 8b
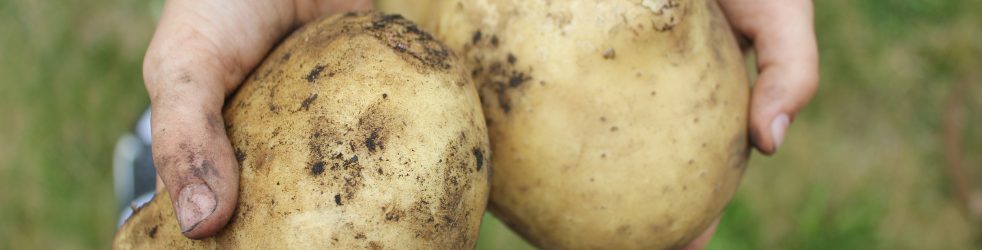
Want to find some buried treasure? There’s a surefire way to find some–plant some! Seriously though, would you rather break a tooth on some hunks of metal with a rando dead guy’s face on it, or a bite into a soft, buttery Yukon gold? I’ll take the potato, please and thank you.
Growing potatoes is simple and the funnest thing ever to harvest.
- When to plant: St. Patrick’s Day through April.
- Soil Temp: 45 (minimum)
- Planting Depth: 6” deep
- Spacing: 12” per plant.
- Prepare: Cut potatoes to have at least two eyes per hunk, unless you’re planting Makah Ozette fingerling potatoes, which are planted whole for disease resistance.
How to source your seed potatoes.
Local farm and garden shops have interesting seed potato varieties that should do well in our local climate and are certified disease free. Makah Ozette fingerling potatoes can be purchased from Slow Food Seattle. Plan to start looking or ordering in late February. Don’t tell, but I have saved organic potatoes that grew eyes (chitted) and planted those with excellent results. 🤫

Growing Instructions
First, a Word About Hilling. Hilling is the act of piling up soil around the stems of the potato plant. Usually about halfway up the stem. This kind of treatment would give other plants stem rot, but potatoes love it. They eagerly put out more roots and tubers in the loose soil. Hilling has the benefits of smothering weeds, helping water to drain, increasing the harvest, and protecting your potatoes from the sun. Sun exposure turns potatoes green (they generate chlorophyll), which indicates that the potato is producing a protective substance called solanine, which is a toxic alkaloid. (The bad tummy ache kind, not usually the deadly kind. Read this MSU Article.)
Step 1: (Optional) Chit your spuds. A week or two before planting, put your seed spuds in a dark humid space to get those eyes sprouting. Vigorous growth indicates a healthy seed potato. You may cut your seed spuds to 2 eyes per potato, but you don’t have to.

Step 2: Loosen soil and plant at least six inches deep, one foot apart. Keep some garden soil handy to use for hilling. If your beds are full, you can remove some soil and load it in buckets or pile up on a tarp nearby to use for hilling as they grow.
Step 3: Work in some well balanced fertilizer, or if you’re like me and have too much organic matter in your raised beds, you may want to go with a nitrogen rich feather meal. Since I use an organic fertilizer that takes longer to break down, I add it at planting time.
Step 4: Keep em’ covered. If you’re not actively hilling to increase your harvest, be sure to bury any spuds that peek up out of the soil.
Raised Bed Growing Notes
Raised beds typically drain better and have a lighter, fluffier soil texture which is easier for the potatoes to expand into. However, they also dry out faster and need consistent water during hot/dry spells of summer or they may go dormant before they put out a lot of taters-eh hem, potatoes.
In-Ground Growing Notes

You may need to wait until April to get that warmer (at least 45 degrees), well drained soil, in an in-ground bed. Cold, wet soil increases the odds of disease and rot. Plant your potatoes as directed above and plan to do more hilling to get a good harvest as it’s easier to break into the hilling soil than the heavy ground soil.
Pro-Tip: If you are worried about how wet the soil is, plant three or four inches deep, instead of six, and plan to do more hilling. At Edible Stories Market Garden, we plant shallow, and do lots of hilling by scraping soil from the path and using fluffy, finished compost. We get a fantastic harvest, if we are able to beat the gophers to them.
Potatoes love containers!
A potato bag or box can be filled as the stems grow to provide an amazing harvest for a small footprint. In an empty container, add a few inches of potting mix or other light garden soil, lay in your seed spuds, and cover with 4-6” of soil. Gently blend in a well balanced organic fertilizer and water in. As your plants grow, repeatedly top-up with more soil, (again about half way up the stems) eventually filling the container. Containers, especially fabric pots or burlap bags, will need regular water and all container plants are dependent on your for adequate fertilizer. If you see any yellowing early in the season, add some liquid fertilizer to your watering can for quicker access to nitrogen and gently work in (or side dress) some more organic fertilizer.
When to Harvest
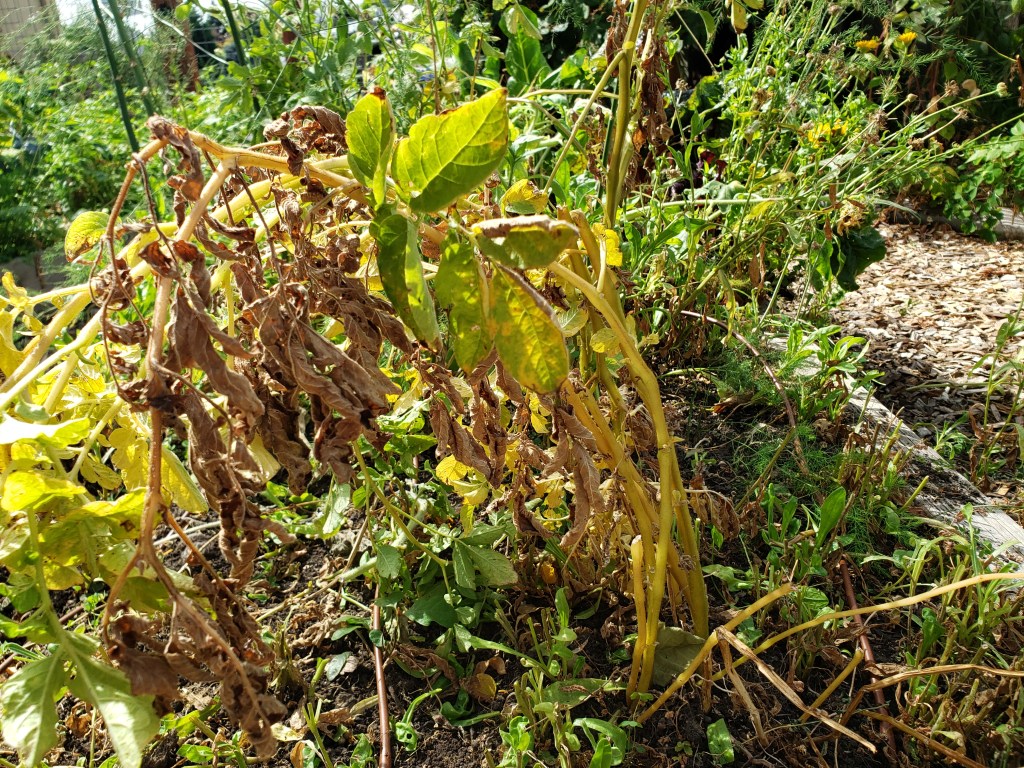

Late summer, (August-ish) when they go dormant. You’ll know because the potato foliage will die back. When it looks very yellow and maybe even a bit crispy, stop watering your spud bed for a week or so and let the soil thoroughly dry. Then holding the bottom of the vines, pull up the potatoes. If the vines break off you’ll have to dig by hand. I use my hands only, so I don’t damage the potatoes with a sharp tool. If the ground is too hard, I’ll go outside where I think the potatoes are and dig down, then lift the soil to loosen it. I generally underestimate the circumference of the growing area and cut into a spud or two. If any are damaged, just follow Sam’s advice: “boil em, mash em, or stick em in a stew”.
Curing Potatoes
For longer storage, be sure to cure the skins. To do this, brush off the dirt (no washing) and lay out your spuds single layer and let them air-dry and cure for a week or so. Keep them out of sunlight and in a cool-well-ventilated place. Since that’s difficult to find, I use a dark corner in our house, and layer them in cardboard flats.
Storage
After curing, brush off any clinging dirt. Choose only perfect potatoes i.e., no wounds, no pest damage, no signs of any infections like soft spots or weird discoloration. For short term storage, a good ole potato sack, cardboard box, or paper bag, in a cool dark area works beautifully. For longer storage try this packing method outlined in my October Calendar.
Dos
- Grow them in a new spot each season.
- Let the soil dry between watering. Deep watering a couple mornings a week with a drip system is the gold standard.
- After harvesting, brush dirt off potatoes.
- Store them in the dark to prevent them turning green.
- Check on stored potatoes weekly and knock off any eyes. (Unless it’s close to planting season.)
- Remove any potatoes showing signs of spoilage.
Don’ts
- Wash potatoes. This will shorten the storage life of the potato.
- Store them in plastic. They are dormant but living and need fresh circulating air to prevent spoilage.
Resources
OSU Extension: Grow Your Own Potatoes
