

Willamette Valley Oregon, Zone 8b
🌬 My daughters shuffle around the house wrapped in soft blankets. They are fully prepared against an ambush by a comfy chair and a nap. There is wisdom in this. After all the bright light and hustle of summer, they are compelled to den up for the winter. I feel the pull too, but the song of the garden calls me and I answer to ensure that she will be ready to awaken with vigor next spring.
🍃Leaves are blowing everywhere. Whenever I rake up a pile, the trees drop their next round. It wasn’t until I studied permaculture that I could see leaves for the wonderful gift they are.
Leaves, Nature’s Gift🍂

Wire Leaf Bins and Metro Composter 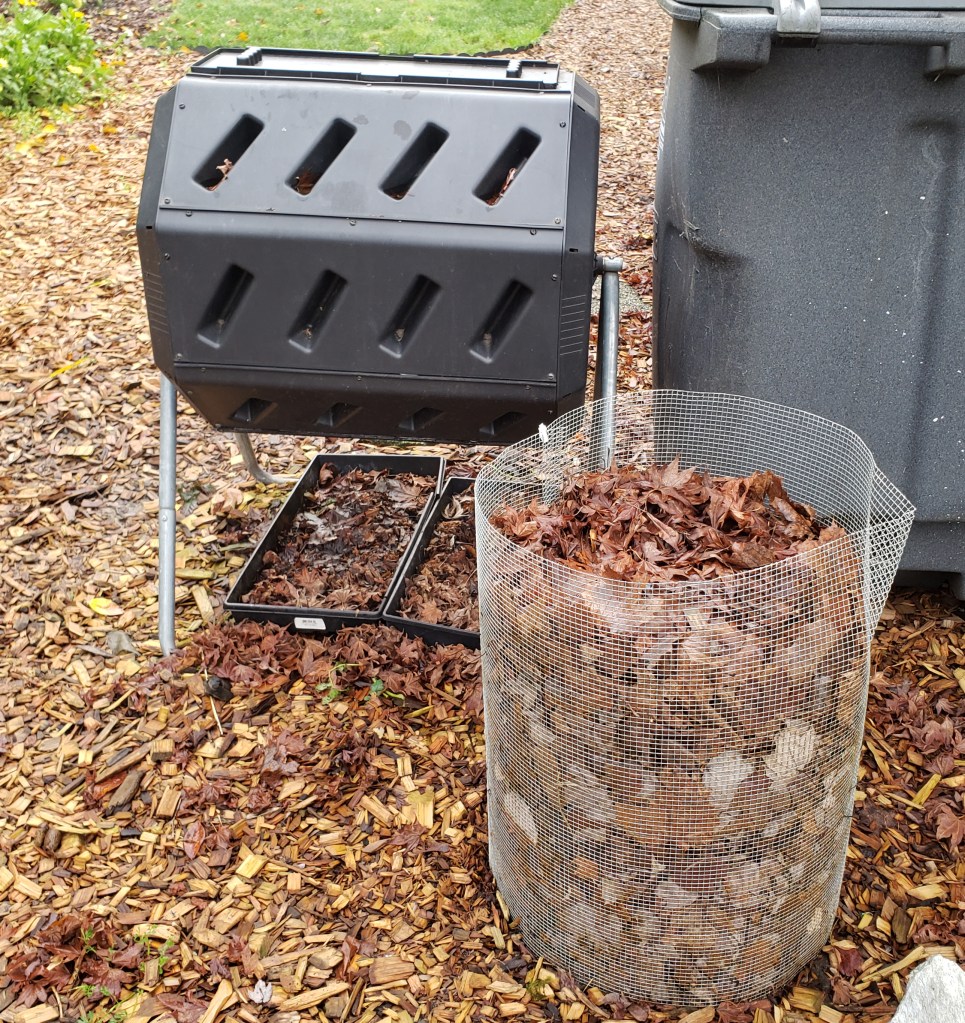
Compost Tumbler and Leaf Bin
Some sources say run them over with your mower and bag to collect, but I prefer to rake and haul to preserve overwintering insects. A bin made of wire fencing is perfect. No matter how many I save I rarely have enough to get me through the year.
Uses for Fall Leaves
- Winterizing garden beds.
- Establishing new beds.
- Carbons for your compost.
- Leaf mold.
- These leaves go in the municipal bin:
- Fruit tree leaves. Pest and disease may overwinter in fruit leaves.
- Roadside leaves. These risk collecting pollution.
Right after the leaves drop, most of them go on my garden beds to protect any bare soil from the pounding rain. Winter is my building season, so I use them to layer in organic matter for establishing new tree guilds and in-ground garden beds. The rest wait in wire bins. I make sure to have a bin located next to my two composters. A good balance for additions to the bin is 50% greens and 50% browns.
Whatever leaves are left break down to become leaf mold. (Takes about two years.) Leaf mold is gold standard mulch for garden and perennial beds. I lift my wire bins up and pull the leaf mold from the bottom and put it on the plants I love the most. See? 🍁Leaves are nature’s gift to gardeners. Read more about leaf mold in my mulch article.
A word about leaf blower options.
Check your Stored Vegetables 🥔🥕🧄🧅
Take a peek in on your potatoes and knock off any eyes and remove any that have soft spots or black spots. Check the rest of your root vegetables and squash and remove any that are looking sketchy. (Read more about Harvest Storage.)

Makes amazing blueberry mulch. Wilco stores carry this product for less than $10 a bag. 
The Berry Patches
Blueberries: I like to make a new addition of pine shavings this time of year to protect blueberries from the relentless rain and winter frosts. Wait for February to prune. If you’re sprinkling lime, be sure to avoid your blueberry patch. They love very acidic soil.
Strawberries: Remove any fourth year strawberries as their productivity drops off at this age. You can usually tell which ones are the oldest by looking closely, they are big and dense with stems. If there are any large vacancies feel free to relocate a few of the runners to fill in the spot. I don’t mulch strawberry patches in the winter because of the abundance of pests that are eager to take up residence in the mulch. There is also danger of crown rot if the mulch is wet and pressed up against the crown. One year when I was a tad overzealous with the mulch, I lost most of an established patch to rot and pests. Since then my strawberries have demonstrated to me that they can take care of themselves and their soil with out my interference, er, help.
Raspberries & Blackberries: Remove any dead or diseased canes. Mulch with fall leaves. Follow pruning techniques as laid out in my guide for Fruit and Rose Pruning.
Elderberries: Remove any broken, dead, or old canes. Second year canes produce the most/best fruit, whereas old canes tend to split and are less productive. They are vigorous growers so don’t be shy with the pruning shears.
It’s a Great Time to
- Plant Spring Bulbs
- Sow Wildflower Seeds
- Many wildflower seeds like echinacea, bee balm, milkweed, and lupine need a chilling period (cold stratification) before they will germinate. Broadcast seeds now and let winter do the work for you. Birds will likely help themselves so sow heavily and dust come compost over the top to hide a few.
- Bring in Tender Perennials
- Wipe pots clean and bring them inside for winter, or create some shelter and protection from frost and wind outdoors. (Cold frame, mini-hoop house, mini-green house, basically plastic sheeting and some sort of framework.) I do this for my lemongrass, Australian mint bush, and fuchsia. Try not to worry if they look sad all winter—they will bounce back once the days start getting longer in spring.
- Plant Trees, Shrubs, & Other Perennials
Final Lawn Mowing…?
Each time I mow in November, I am sure that it will be the last time of the season. So I have learned to wait to winterize the mower until the end of the month, or even December. If you use ethanol gas, don’t fill your tank fully, as ethanol gas is corrosive and should be drained before being stored for the winter. In our old mower, we used non-ethanol gas and it seemed to be OK for winter. Or you can simplify like we did and switch to a battery powered mower. We invested in a DeWalt battery mower and it is powerful, self-propelled, and oh-so-much quieter.
November Lawn Care Tips
- Final fertilizer application is scheduled for around Thanksgiving. This is a 1/2 rate feeding. Turfgrass Growing Guide
- Mow on a high level – so the blades are around 3″+ tall after mowing.
- Cut on the mulch setting right over the last drift of fall leaves. They will break down and enrich your soil.
- If you did not add compost to the lawn, add a light sprinkling of lime. Compost usually has a lot of salts, usually making an addition of lime unnecessary.
- At the end of the month store your lawn mower for the winter by:
- Removing ethanol gas or running it out of gas.
- Power off and allow it to cool and dry. Then clean out the grass that is stuck to the framework.
Establish New Beds & Planting Areas
Get your boots and shovels! The dormant season is ideal for landscape projects. 2022 Fall project was naturescaping my front yard space. The weather is cool, the soil is soft, time is easier to come by, perennials have time to settle into their home and establish their root systems before spring demands new growth, and there is time for organic materials to compost naturally, building teams of worms and microbes that will be ready to boost spring growth.
Design Process
Like all things gardening there are a 100 ways to do it right. Here is my way:

Color code: Yellow = mulch. Green = annual beds. Blue = stormwater drainage & rain garden. Pink = wildflower bed. Brown=mulched berm. Black = asphalt.
- Observe. Notice the natural systems: solar aspect, water pooling, shading elements (e.g. the north side of buildings and trees will tend to be shaded most of the year), wind, soil types, conflicting root systems. Next look at physical elements like proximity to hose bibs, or irrigation systems and tool sheds.
- Imagine. While standing in the available space, visualize different options. In-ground beds, pathways, routes to manage the beds. Scrub that image and try a new one. Once you get a vision that meets your needs and aesthetics, it’s time to put it down on paper.
- Draw. Using Google Maps or Google Earth, use the Measure Distance tool to draw up a scale map of the area. Next I make copies of the map and doodle away. Drawing and refining on paper is infinitely easier than moving earth. It will help you identify problems and ways to make your space more efficient. It is well worth the effort. You will also be able to calculate how much material you will need as most garden centers sell rock, sand, top soil and garden soil in increments of ½ cubic yards. I also use Google to convert my cubic feet (or sometimes inches) calculations into cubic yards and round up or down to the nearest ½ yard. That saves me trips to the landscaping companies.
- Build. Now for the fun part! Time to realize your vision and bask in the glory.
- Plant. Getting perennials in the ground in fall and winter is a wonderful way to give them a head start for the next growing season. See my Guide for Planting Trees and Other Perennials
- Evaluate. After each season evaluate how your new landscape performed. Plan for repairs and redesign areas that revealed problems you didn’t anticipate.
In-ground Beds

Sheet mulch for pathways. 
In-ground beds established fall of 2020. 
This bed is on the north side of the house. Produced lettuces well, but did not thrive like the east bed. 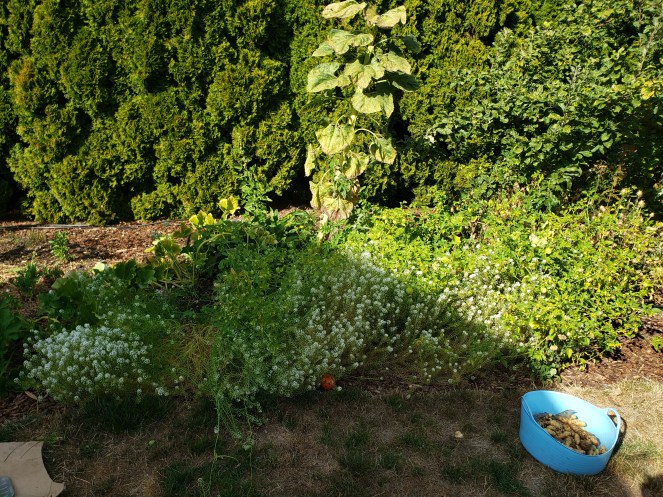
This bed was in full sun all summer, the shade from the house only began to reach in September. This bed was very productive in it’s first growing season. (2021)
Backyard gardeners have received the message loud and clear regarding the benefits of raised bed gardening. However, in-ground beds have advantages too, even if you have heavy clay soil like I do.
Benefits
- Slower temperature fluctuations (cooler during the heat blasts of summer).
- More consistent water (my raised beds dry out super fast).
- 100% Cost savings: no wood, no initial purchase of soil to fill the box.
- Easier to use long handled tools like hoes.
- Easier to get going.
- Better access to established soil networks of fungi, microbes, worms.
- Clay holds nutrients and water.
Considerations
- Keep things in reach without stepping on planting areas. So for me, I restrict my beds to no more than four feet wide, since I can reach two feet on either side.
- Pathways need to be at least 18” wide for my big feet and buckets. However, remember to plan for wider wheelbarrow width paths where necessary.
- Remember that the root systems of nearby trees and shrubs may invade your new bed.
Next I head out with string and spray chalk, and string to lay out the different areas. I don’t have to call before I dig, because I don’t have to dig!
I use the strudel method:
- Lay out a layer of cardboard over the planting area. It helps if your cardboard is soft from sitting in the rain.
- Stab the cardboard with a digging fork to allow gas exchange and movement of water and soil fauna.
- Add a thick layer of fall leaves.
- Add some raw compost. (I empty my composters and spread the mess over the leaves.)
- Add another layer of leaves.
- Top with a layer of finished compost. (Mainly this just keeps the leaves from blowing away, but it does add to the organic matter.)
- Allow to rot down all winter.
- I might get in there with a digging fork a few times to stir things up a bit to encourage it all to cook down.
By spring, even dense heavy clay like mine will be fluffier and infused with nutrient rich organic matter. In the first growing season after this treatment, my new in-ground bed, (the sunnier one) outperformed my raised beds. The other, is in the shade of our house, and performed just OK.
Important: Remove all unfinished organic matter before spring planting (recognizable as a leaf, etc.) and return to your composter. Be sure to mulch new beds with finished compost or finished leaf mold. (Slugs and decomposer helpers will munch on your baby plants.)
Building Raised Beds

SBG Raised Bed Boxes 8′ x 4′ 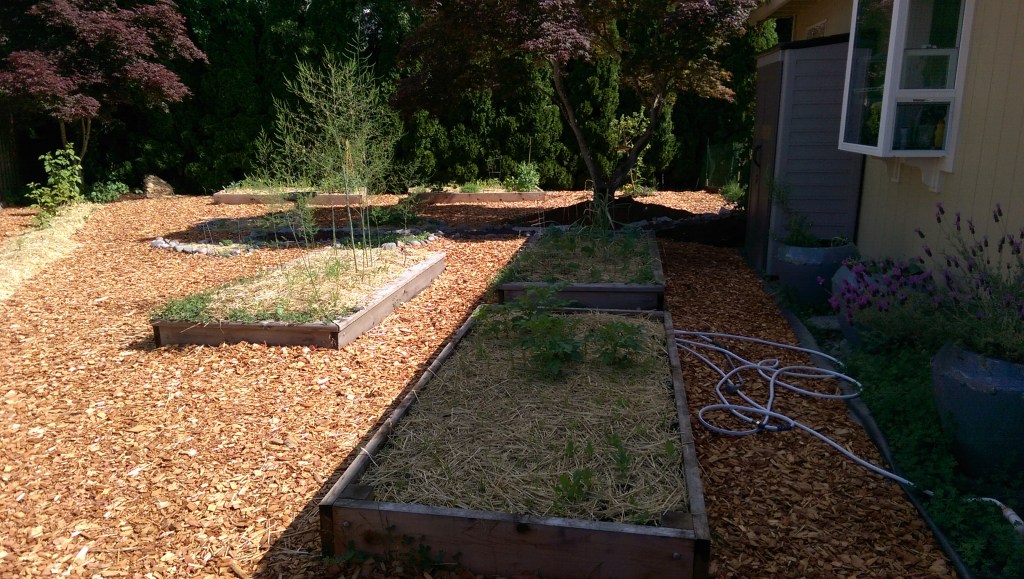
SBG Raised Bed Boxes Mulched 
Cedar raised beds we built for a school garden. 8′ x 4′ x 20″. Notice the reinforced walls and posts protruding from the corners to enable us to level the beds. 
Raised beds installed at our school garden.
Benefits:
- Faster draining (the mythical well drained soil!)
- Quicker to warm.
- Soil mix of your choice.
- Easier on your back to work on.
- Provides a barrier to keep dogs and kids out of your beds. Our labrador mostly avoids our boxes but tramples through my in-ground beds.
Disadvantages:
- Lumber is expensive to buy. (Use untreated wood.)
- Building tools and experience required.
- Need to purchase soil and fill. This is more of an issue than one would think. What do I choose? Some people choose a potting medium, as a raised bed can be considered a large container. But that’s a lot of bags. Others buy a garden blend from a landscape company. This is what I usually do, but unfortunately, the blends are often too heavy in organic matter. Sometimes as much as 80% organic matter. (NRCS says to shoot for 5% organic matter.) Too much organic matter leads to phosphorus build up in your soil as well as other salts. Also the organic matter eventually disappears and after a few growing seasons leaving your boxes nearly empty.
- Weeding is more difficult because some, like birdsfoot trefoil, (Amy’s bane) grows in the joints of the boards and along the ridges making it nearly impossible to get all the rhizomes.
- Cedar, the gold standard, can only be expected to last for about 10 years. Consider using Juniper. It lasts a bit longer than cedar and is grown in Central – Eastern Oregon where it’s becoming a tad overgrown due to fire suppression.
Still, boxes provide clean lines to your garden, and for square foot gardening enthusiasts it makes figuring out plant spacing super easy.
To set up your boxes:
- Decide what your preferred size should be. I like 8’ x 4’. About 10” high. Everything is easy to reach and the box is strong. Longer boxes tend to bow out on the long side. It’s OK to go longer than 8 feet, just be sure to design in reinforcements. Taller boxes are more expensive to build and fill, but can be easier on your back and allow for deeper rooted vegetables.
- Plan for wide pathways so you can work and get a wheelbarrow through if necessary.
- Level your boxes. We usually leave legs on the corner posts and pound or dig them in to be level. Boxes that go with the land grade tend to bow out towards gravity and have watering issues. Also, level boxes are more aesthetically pleasing.
- No need to remove turf. One your boxes are installed, lay about two layers of cardboard inside. Wet thoroughly and perforate with your digging fork, breaking into the soil below.
- Fill with soil of your choice. (Sand, silt, and clay as well as vermiculite are stable and will remain–these are your friends.)
- Add cardboard to the pathways around the outside of your boxes as well. Cover with a coarse woodchip mulch to suppress weeds. If you don’t, your foot traffic will kill the grass around your beds, except right next to the frame giving weeds a jumping off point to invade your beds. Nice pathways also keep your shoes from getting muddy and are good for the soil. Plan to top off your pathway mulch every three years or so.
It’s not too late!
There is still time to plant garlic and sow cold-hardy cover crops. Also, make sure you have winterized your garden beds and your irrigation systems. Check the October Calendar for more details on these tasks.
🐦🦋Wildlife Care🐞🐝


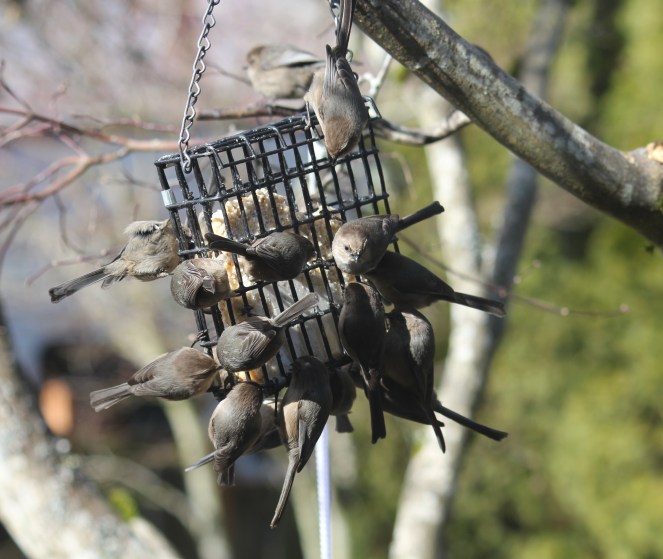
- Watch for sick birds. Salmonella spreads quickly at busy feeders. If you find any sick birds, take down your feeders and bird baths for a couple weeks. Sanitize before setting up again.
- Birdbaths: Continue to clean at least once a week. The cooler weather will inhibit algae growth, but to keep it from spreading sickness it should be flushed out and scrubbed regularly.
- Feeding:
- Suet provides energy and is tidy so as not to encourage rodents.
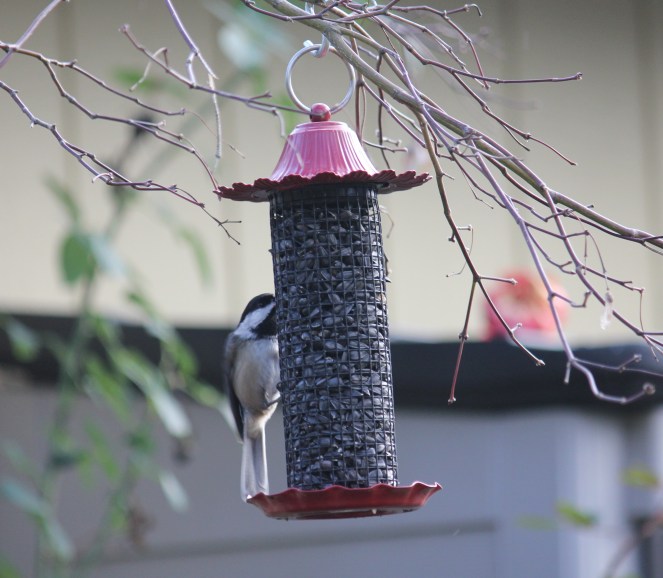
- If using a seed feeder, don’t skimp on the blend. Birds are choosy and will fling out the stuff they don’t like. Then mice and rats will clean up the discarded seeds and maybe set up camp under your house. I use black sunflower seeds in a tight cylinder feeder. The birds have to work the seeds out individually.
- Thistle socks are a favorite of goldfinches. Be sure to wash between fillings.
- I also bring my seed feeders in at night.
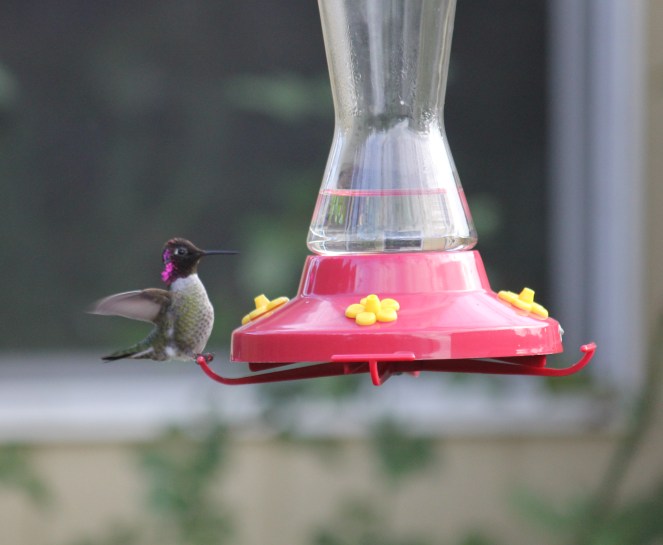
- Hummingbirds: Some of our Anna’s hummingbirds choose to overwinter and rely on nectar feeders to supplement their diet. Clean and refill at least once a week. I have a glass feeder and like to pour the nectar in while it is still very hot to help sanitize the feeder. Then I let it cool on my counter before hanging it back outside. Read more about hummingbirds.
- Bugs & other critters: Leave the leaves, wherever you can. (Except in the orchard—those ones have to go.) Cover your beds and bare soil. Leave flower stalks and seed heads and such until early spring. Our insect friends overwinter as larvae, eggs, or in their adult form. They need shelter and will thank you by coming back in large numbers in the spring. (E.g., as soon as the aphids show up—I find ladybug eggs and larvae everywhere.) I also leave spider eggs sacs because they are voracious consumers of pest species. In addition, they are an important protein source for hummingbirds and provide webbing for their nesting material.
- Keep it messy! If you’re feeling bad about leaving your yard messy for fall and winter, read this article from the Audubon Society and you will feel much better about it. To Help Birds this Winter, Go Easy on Fall Yardwork.
Resources:
- SBG: Five Tips to Help Hungry Hummingbirds Survive Winter
- OSU Extension: Rain Gardens
- Oregon.Gov: Rainwater Harvesting – Oregon Smart Guide – Building Codes Division
- Oregon Metro: Swales and Rain Gardens(.pdf presentation)
- OSU Extension: Growing Strawberries in your Home Garden
- OSU Extension: Raised Bed Gardening
- Audubon: To Help Birds this Winter, Go Easy on Fall Yardwork
